How to Create a Virtual Open House Landing Page
You can use the Landing Pages Tool in your Redwood Website + CRM Platform to create Virtual Open House that you can share to Facebook Business Pages.
Before you create your landing page, you will want to make a video of yourself walking through the property as if you were walking a client through an open house. This will be uploaded to your landing page, but first you will need to upload this video to YouTube. If you are not familiar with how to do this, please read this guide: How to Upload a Video to YouTube.
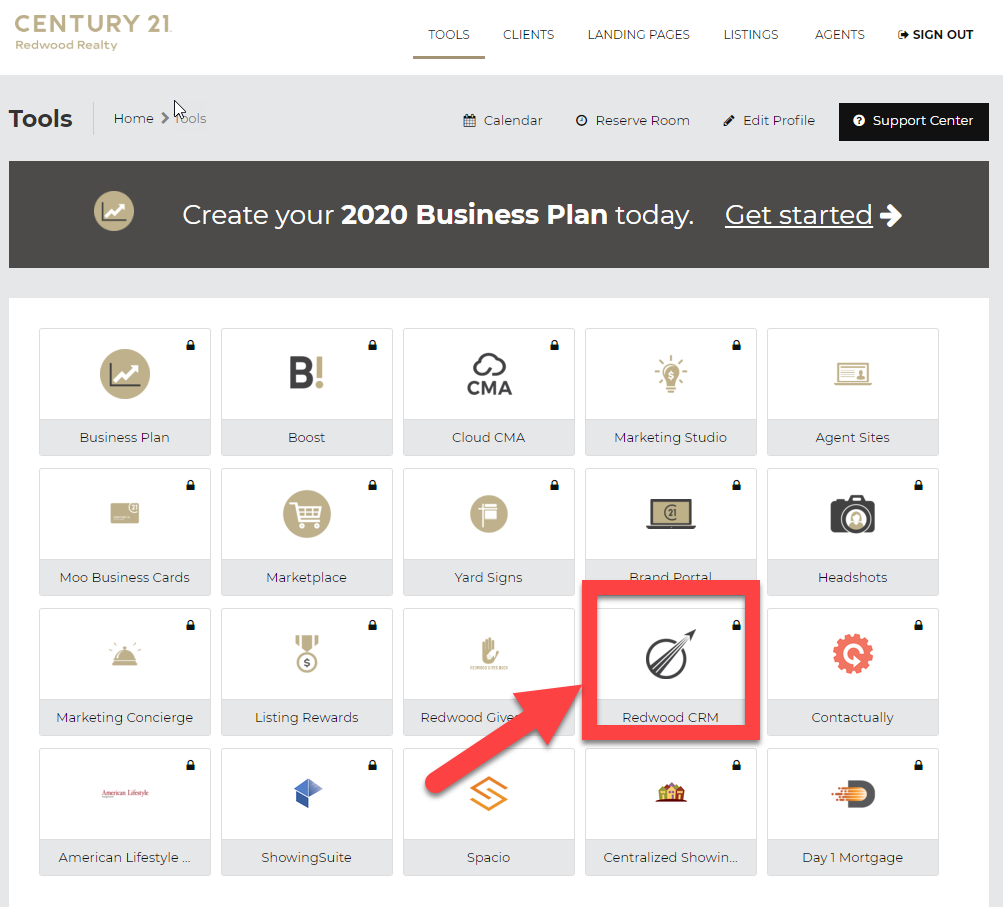
To start building a landing page, you will first login to your Redwood Website + CRM Platform from your accessRedwood by clicking on the icon on your Dashboard.
Then, on the left side menu navigate to Lead Engine and locate Landing Page.

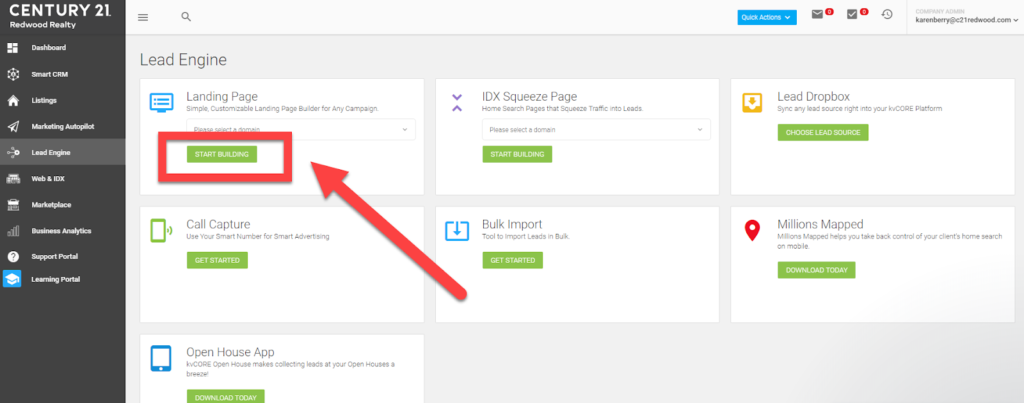
To begin creating your Virtual Open House Landing Page click Start Building.
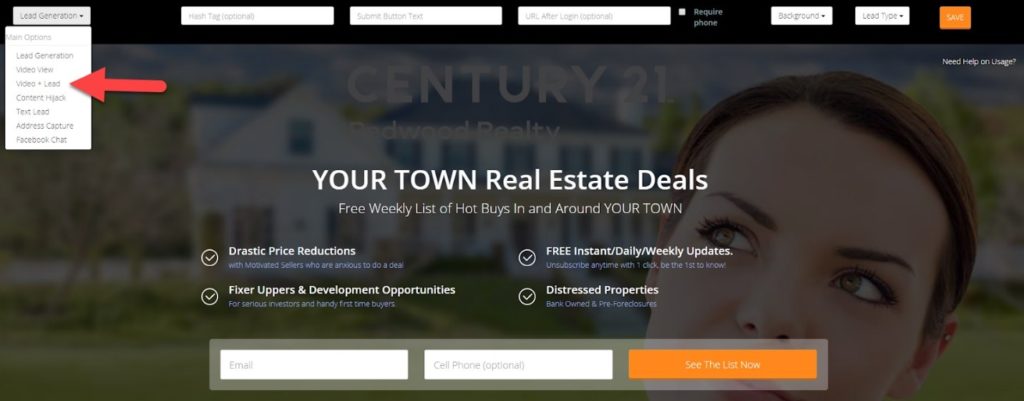
The next page you see will be the Landing Page, now you can start building! At the top you will see a banner with empty fields. Working from Left to Right, begin to complete these fields:
Lead Generation: The best option when creating a Virtual Open House is Video + Lead. This will allow you to add your walk through video to your landing page, as well as a registration field for customers to sign up with their email and phone number.
#Tag: If a Lead is captured off of this page, it will be added to your CRM with the hashtag you add in this field.
Submit Button Text: This will populate in the orange button below your video. You can use “Open House Tour” for example.
URL Login: This is the URL to which the customer will be redirected after they click on the Orange Button. You can put the link to your Single Property Website for that property or a link to your matterport tour for example.
YouTube ID: This is where you will put the link to your walk through video. Make sure that you have already uploaded your video to YouTube. To embed your video into this page, you will only need the YouTube ID. To get a video ID, open your video on YouTube and copy the ID after the V= in the URL and copy it into this field. ![]()
Background: Select from this Dropdown Menu what image you would like to appear as the Background image of your landing page. One great option for this Virtual Open House is to select the option “Primary MLS Image” and enter the property’s MLS Number when prompted.
Now you can edit the remaining fields on your Landing Page simply by clicking on them.
PLEASE NOTE: All of the text is editable, but keep in mind double clicking any text will cause it to disappear and you cannot add it back. Be careful to click only once on text you want to edit, and click twice on text you want to delete.
When you have the content of your Landing Page exactly how you want it, click SAVE in the top right corner. This finalizes the content of your page, and you are now ready to share! 
Be sure to save the URL somewhere because it will not be saved anywhere else! One suggestion is to keep a spreadsheet of your Landing Page URLs to return to if you need to access them later on.
You can now copy this URL into a post on your Facebook Business Page!
Click HERE for more information about Landing Pages from kvCORE’s Support Portal
Additional Support
Have more questions? Visit the kvCORE support portal for detailed instructions and how-to’s on using the platform. Click HERE
Want to take a self-paced learning course? Visit the kvCORE learning portal to enroll in self-paced courses to become a Redwood Website + CRM expert. Click HERE