Creating A Buyer Presentation in Cloud CMA
Haven’t set up your Cloud CMA account yet? Visit this guide to get started!
Option 1: Building a Buyer Guide from Cloud CMA website
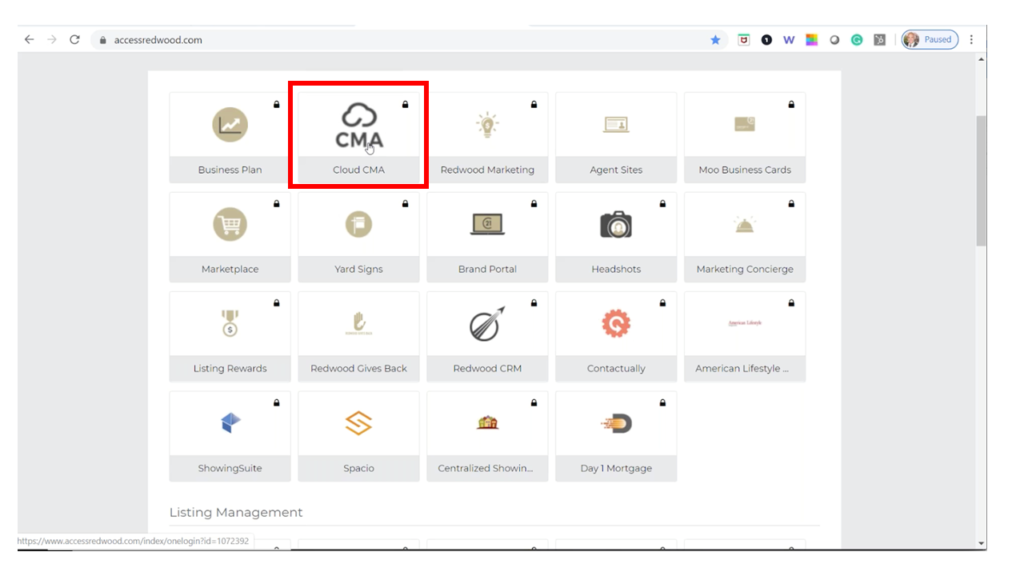
Step 1: Go to accessRedwood.com and click the CMA Icon:

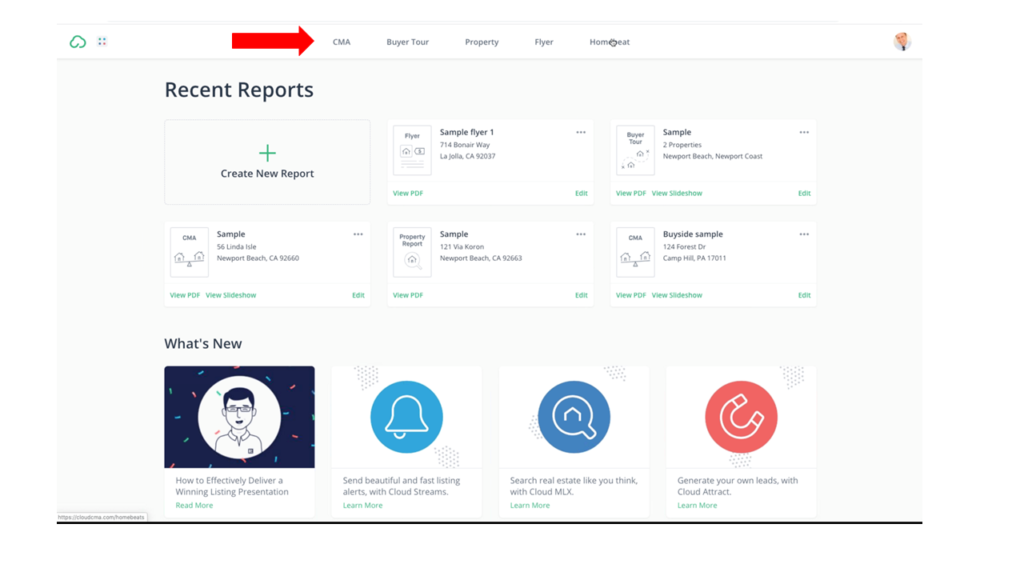
Step 2: Click Buyer Tour at the top of the page

Step 3: Name the tour, enter the applicable MLS number(s) and click “Fetch Listings.”

Step 3: Organize the listings in the order you’d like them to appear in the final report (ex. price lowest to highest.) You can also reorder by dragging and dropping each listing

Step 4: Customize Your Buyer Tour
Add all of the new Redwood Buyer Guide pages by clicking the green + symbol to the left of the page name in the left menu.

Tip: Once you have created a buyer tour/guide, you can save it as a template by clicking the “Template button.” You can then rename and customize your templates for future use.
Step 5. Publish the report and view PDF. When ready, you can email the report or send a link to the PDF directly to your buyers.

Option 2: Building a Buyer Guide from BrightMLS
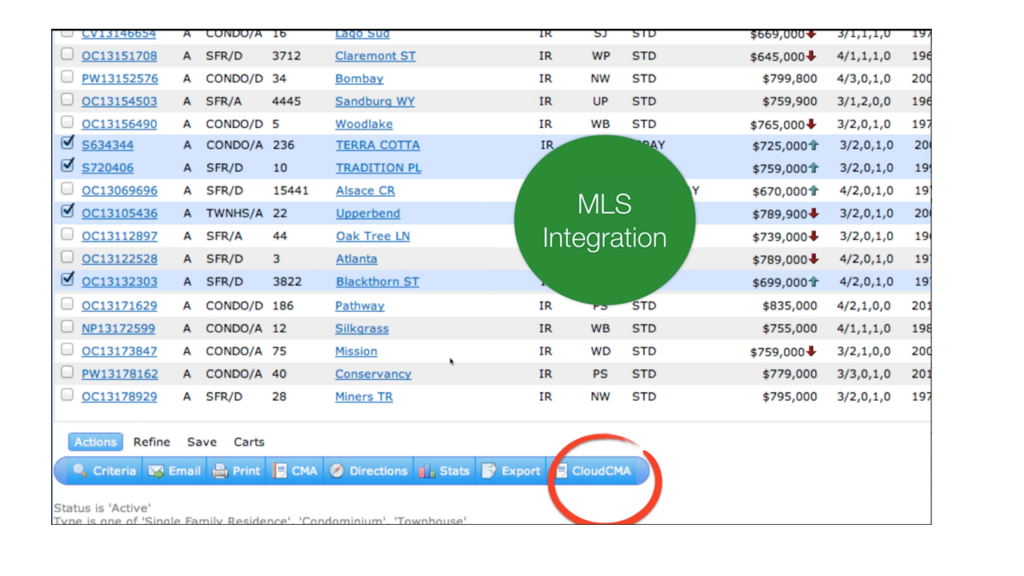
After you associate your BrightMLS account with your Cloud CMA account on https://cloudcma.com/, creating a CMA and Buyer Guide from your BrightMLS account is easy! Perform a search in BrightMLS and select the properties that you would like to include in your Buyer’s Presentation. Then, click the Cloud CMA button in the bottom menu of the Bright MLS page to automatically import these properties directly into your Cloud CMA account to complete your CMA.

If you prefer to create your Cloud CMA reports directly from the Cloud CMA website, access the website by clicking the Cloud CMA icon on accessRedwood. The following short video will demonstrate the steps to build a CMA from the website. Click HERE to view the video.

Additional Support
Have more questions? Visit the Cloud CMA Support for detailed instructions and how-to’s on using the platform. Click HERE
Unsure how to create a CMA? Watch this video.
Want to take a class or watch a video to teach you how to perform common tasks on Cloud CMA, access Cloud CMA Learning Resource portal by clicking HERE
Need to contact Cloud CMA, use the Chat function in the lower right of the screen on http://cloudcma.com/ or email [email protected].